Friday, July 30, 2010

Buffalo-Style Chicken Cordon "Blue"


I'm sure there are people out there who don't like buffalo wings, but I don't know any of them. I definitely know people who do not like hot wings, though.  I'm a wuss when it comes to spicy dishes, and I absolutely loved this one.

I was watching Rachael Ray on Wednesday while hanging out with my dad and she made this dish.  It looked really simple and very delicious.  It was! I don't really know what to say, besides, this:  If you love wings and blue cheese, you'll love this.  It's kind of a buffalo version of chicken cordon bleu, but it's blue cheese instead of Swiss cheese.

See Update at the end of the Post.
4 boneless, skinless chicken breast
4 slices deli ham
1/2 cup blue cheese crumbles
Salt and pepper
1 cup flour
1/4 to 1/3 cup corn starch, eyeball it
2 large egg whites, beaten
1 1/2 cups breadcrumbs
3 tablespoons melted butter
About 3 tablespoons hot sauce
Canola or other high temp oil, for shallow frying
Carrot and celery sticks, for garnish (optional)
 
Split the breasts open and cut them across horizontally. Pound the meat out a little then stuff with ham and cheese. Fold over and press edges to secure stuffed breasts. Season the chicken with salt and pepper and coat in flour mixed with cornstarch, then egg white, then breadcrumbs tossed with melted butter mixed with hot sauce.

Heat a shallow layer about 1/4-inch deep in a large skillet over medium to medium-high heat. When oil is hot, cook chicken on each side until golden and cooked through, about 6 minutes on each side or until cooked through. Drain chicken briefly on paper towels and serve with carrot and celery sticks along side.

I made one mistake while preparing this and it was using vegetable oil instead of canola oil. I didn't really think it would make much of a difference, but it blackened the bread crumb coating.  It was still VERY delicious, but just giving you a heads up in case you decide to try it. I when I was coating the chicken, I had a taste of the buffalo sauce infused bread crumbs and thought it was going to be too spicy for me, but after cooking, I felt there was very little spice to it.  You can always add more hot sauce to it at that point if you feel you need more spice. The mashed potatoes paired really well with this dish.  I hope you enjoy!!


Update: August 2014
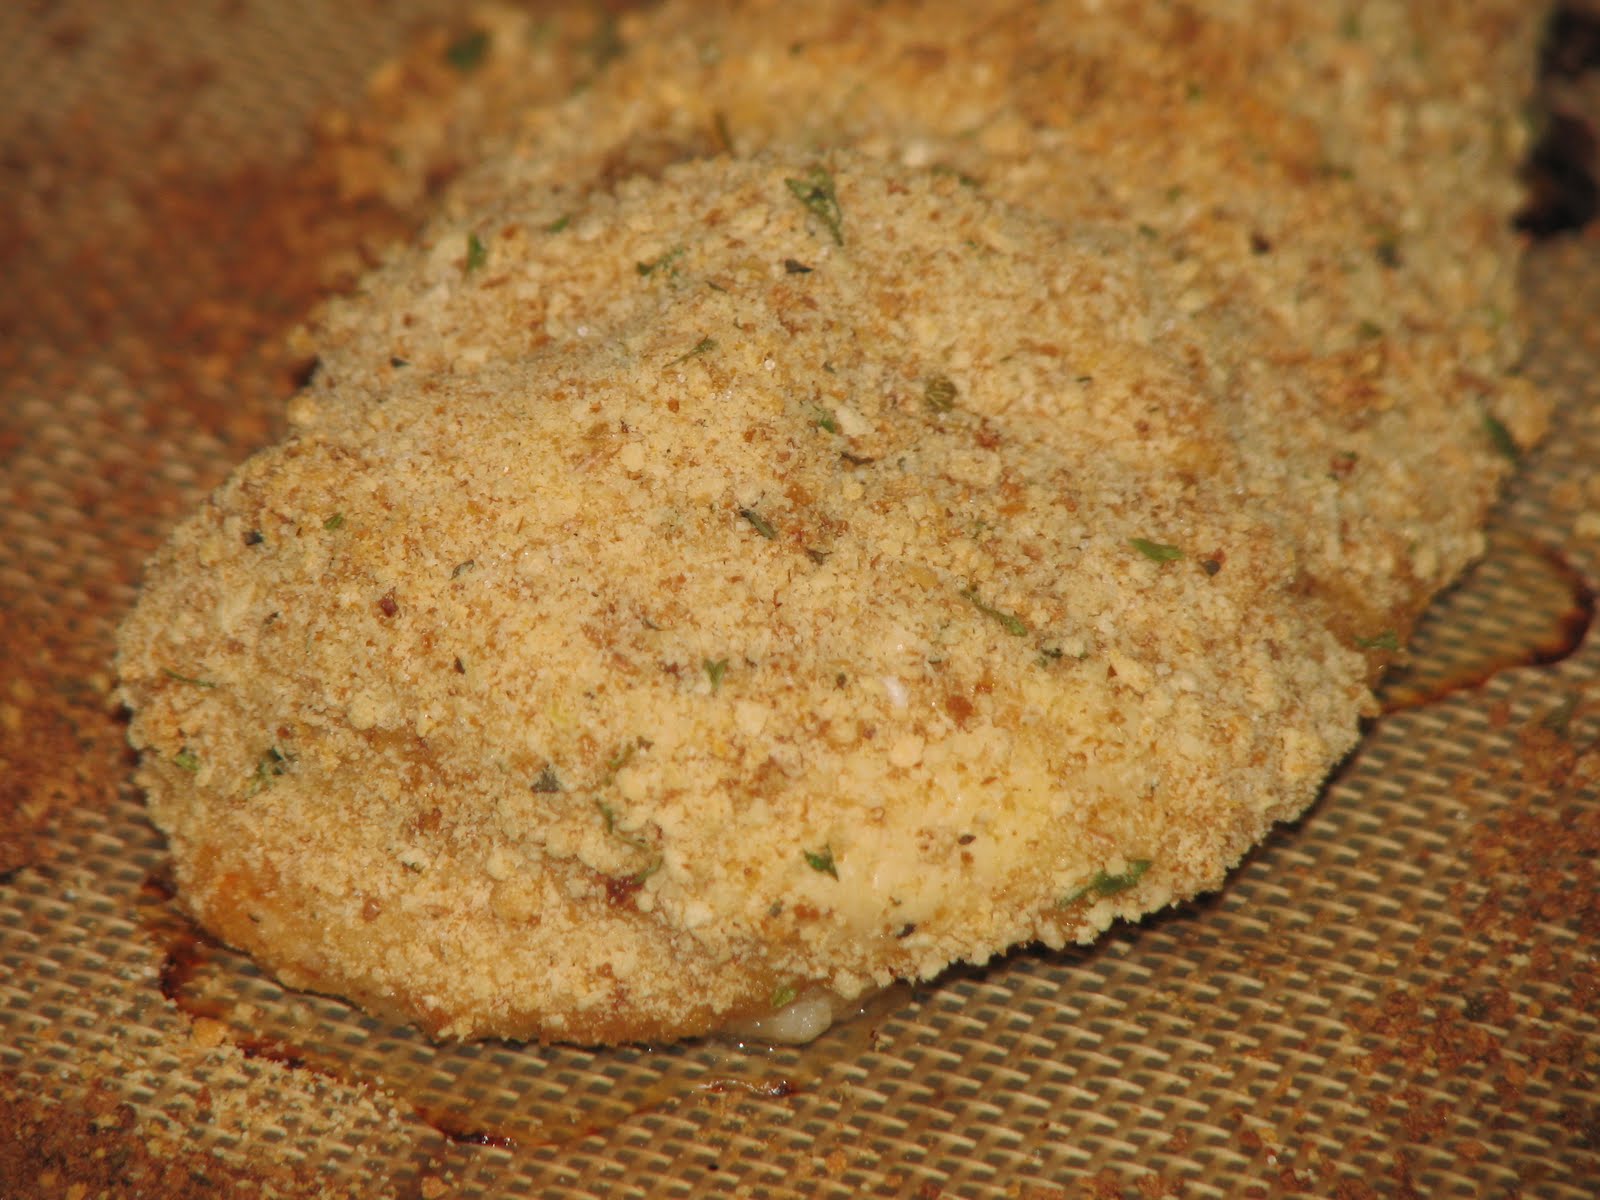
I no longer cook the chicken solely by frying. I now only brown the breading in the pan and then transfer the chicken to a pan with a silicone baking mat. I finish baking the chicken at 350 degrees for 30 minutes. This allows the crunchiness without burning the breading.


Thursday, July 29, 2010

Citrus Grilled Salmon, Zucchini and Corn on the Cob

Sometimes recipes can find you in the oddest of places. My mom actually discovered this from the fishmonger (person who sells fish) at Sam's Wholesale Club.  Occasionally, at these huge warehouse places have really delicious buys and this was definitely one of them. The fishmonger told my mom how to cook the fish and make it delicious and it always has been.  I don't have a membership for Sam's, but I don't love my Costco card and they also have fresh fish. I prefer the wild salmon.  It can be expensive, but a little goes a long way.  To save money, you can get a fillet of frozen salmon at Walmart for around $8 - $10.

The grilled salmon is very easy to prepare.  Plug in your George Foreman Grill.  Rub the salmon with extra virgin olive oil (not too much). Sprinkle the fish with Citrus Grill Rub and throw it on the grill. Grill until the salmon flakes with a fork.

There is also a sauce that tastes great with this citrus grilled salmon.  It's mostly mayonnaise and sour cream, so if you're interested in keeping this healthy, you may want to skip the sauce. The recipe for the sauce is 1/2 cup sour cream, 1/2 cup mayonnaise, 3/4 tsp. citrus grill seasoning (the same that we put on the fish) and a sprinkle of dill (or whatever flavor you wish to add to your sauce). Mix all the ingredients and chill prior to preparing the salmon.

I have to say, this is an extremely great meal and the vegetables you see on my plate were prepared by my friend Shelly. 

Grilled Zucchini
2 zucchini halved and sliced
extra virgin olive oil
garlic salt
pepper
freshly shredded Parmesan

Heat your pan over medium heat with a tbs. of oil. Add the zucchini and lightly grill using the the garlic salt and freshly ground black pepper to taste.  Just before you finish, shred fresh Parmesan into the skillet and toss with the zucchini. 

I hope you enjoy these delicious and healthy options. Enjoy!!


Wednesday, July 28, 2010

Pulled Pork BBQ - Lexington Style

Ever since I was very little, I can remember going to various barbecue (BBQ) restaurants with my family. The BBQ Center, Andy's BBQ, Kerley's, Lexington BBQ, Smokey Joe's BBQ and many others. BBQ has been a part of my menu since I can remember. There are many disagreements in the US, South and even NC about what BBQ is. 

Some people use the word barbecue to refer to anything that's been cooked on the grill.  When they refer to barbecue, they don't mean any particular food.  They are only referring to the style in which whatever food they chose was cooked.  When you get to the south (and native southerners), barbecue usually only refers to barbecued pork.  The only differences start to lie with how you choose to cook the pork or even flavor the pork.

In North Carolina, there are two main ways to flavor the BBQ.  In Lexington Style BBQ, the 'dip' (dip is the term that we use to refer to the BBQ sauce) is more of a sweeter flavor than in Eastern NC BBQ.  The Eastern NC BBQ is usually mainly vinegar based with very little sugar or sweetness added.  Lexington BBQ usually has brown sugar and/or ketchup to cut the tanginess of the vinegar. The recipe I used for dip was found online at epicurious.com. It was the closest match (so far) that I could find. It was a little hotter than what I normally like, but very accurate to Lexington BBQ. In the future, I will probably cut the red pepper flakes to a teaspoon or less.  It's always easier to make something spicier if you feel it is too bland.

Lexington Style BBQ Dip
2 cups cider vinegar (16 oz.)
1 Tbs. sea salt
1 Tbs. ground white pepper
1 Tbs. red pepper flakes (or less!)
2 Tbs. white sugar
¼ cup dark brown sugar (packed)
1 tsp. freshly ground black pepper
½ cup ketchup

Whisk together all the dry ingredients. Add the ketchup and mix into a paste. Pour vinegar in slowly while stirring.

You can store in refrigerator, but the longer it sits, the hotter it will get. If you need to cut the spice, add another 2 cups cider vinegar, ½ cup ketchup and ¼ cup brown sugar (salt to taste).


I just bought a pork loin and put it in the slow cooker and poured the dip in on top.  I didn't add all the dip.  I saved some to put on the sandwiches themselves.  Don't forget, the liquid in the slow cooker will be laced with fat, so you can cut some of that fat by using fresh dip. I hope you'll give this a try. Enjoy!!

Tuesday, July 20, 2010

Salmon Patties

In the south, there is the age old debate...is salmon pronounced 'sam-mon' or 'sall-mon'?  I've consulted many sources and dictionaries and every single one says the 'L' is silent.  I'm sure there are many people who are vowing that I am incorrect and if they choose to say it the other way, so be it.  The thing is, does it really matter? To me, it matters, so I'll say [sa-mən] and you can pronounce it however you wish.

Either way you say it, it is a terrific food. Since I was very young, I have loved salmon patties.  My mom made them for us.  I dare say that it is probably one of those foods that you probably have to grow up with to love it. It isn't a delicacy or some truly spectacular dish that people fight over (unless you were one of the three boys in my house and there was only one left).  It's truly a comfort food for me.  I like to eat mine with vinegar.  Don't turn your nose up at that unless you've tried it.  I've made this several times for a few friends that had never tried it with vinegar and they all liked it.

It's a really simple dish to make and I don't really have a recipe.  I searched for 'salmon patties recipes' on google and found many options including the method that my mom taught me. Some were fairly complicated and had lots of ingredients, but from what I could tell, most of them had the same basics. 

You have to have a can of salmon. My mom always suggested (and I have good luck with this too), Wild Alaskan Pink Salmon. The brand that I buy is less important.  When I open the salmon, I carefully remove the bones (mostly the ones that look like a spinal cord...the others disappear when you cook them).  My mom removes some of the skin too, but like to leave it.  It adds flavor.

The other main ingredients were either flour or crackers (saltines) and of course, eggs to bind it all together.  I saw some with onions, lemon juice, peppers and various spices and flavorings.  If you find one you like, then try it.  It's so inexpensive that you can try them all and not feel guilty if they don't turn out.  I may even try a different recipe myself someday.  This recipe is a lot like the deviled eggs:  if you like it, you probably already have a recipe and everyone prefers it the way their mom made it. Give it a try. Serve it up with your favorite side and enjoy!

Monday, July 19, 2010

Chicken Marsala

The idea for making this dish came from my friend, Cyndi. At work one day, she asked me if I had ever made Chicken Marsala (I think it was one of her favorite Olive Garden dishes). I told her that I hadn't, but the idea of it intrigued me.  I started thinking about it and searching for recipes.  In the process I found out that Olive Garden posts their recipes online.  I'm sure they don't post all of them, but there are many appetizers, entrees, desserts, drinks, sauces, soups, etc. posted on the site.  This is where I got the recipe for Bruschetta that I posted a few weeks ago.

Chicken Marsala
(Olive Garden)
4 Chicken half-breast, boneless & skinless
½ cup flour
½ tsp. Salt
Pepper to taste
½ tsp. Oregano, dried
4 Tbs. oil
4 Tbs. butter (or margarine)
1 cup fresh mushrooms, sliced (optional)
1 cup Marsala wine

Pound chicken breasts between sheets of "Saran Wrap" until about ¼" even-thickness. Combine flour, salt, pepper and oregano, blend. Dredge chicken pieces in the flour, shake off excess. Heat oil and butter in frying pan over medium heat. Cook the breasts on medium heat for about two minutes on the first side, until lightly brown. Turn breasts over to second side to cook, add the mushrooms around the chicken breasts. Cook breasts about two more minutes, until lightly browned on the second side, stir the mushrooms. When lightly browned, add Marsala around the chicken pieces, cover and simmer for about ten minutes. Transfer to serving plate.

I found that you have to be really careful when you're turning your chicken.  The coating comes off pretty easily and that's where a lot of flavor is.  Luckily, because you let the chicken simmer for 15 minutes, it really absorbs a lot of the flavor and wine sauce. The chicken was very delicious and tender.  I probably could have cut it with my fork.  I, of course, left the mushrooms out of this recipe, because I just do not like them. I also chose to serve this along side the homegrown green beans because I need to use them before they go bad.  This was a really easy dish and almost everything in the recipe were things already in my cabinet.  I found the Marsala wine next to the balsamic vinegar in the grocery store and it wasn't overly expensive. I'm sure I spent less on this meal than it would have cost to go to Olive Garden.  Was it better?  I wouldn't know, because I had never had it before.  It was definitely worth making and I'm sure I'll make it again.  Enjoy!

Sunday, July 18, 2010

Spaghetti with Meat Sauce

As I said in an an earlier post, Meat sauce was one of the first dishes I ever claimed that I could cook.  I'm not going to lie, though. I don't make it from scratch.  There are only two good reasons to make something from scratch.  One reason is that it tastes better.  This is probably the most important reason. If you can find a way to make something taste better, then do it.  Flavor is what's really important after all.  The second reason to make something from scratch is that it is cheaper.  Most of the time, making something from scratch is not cheaper, it just tastes better. 

If a dish doesn't taste better from scratch and it isn't a lot cheaper, then why are you making it that way?  There are so many sauce recipes out there and I have one that's pretty decent, but I just can't justify slaving over something that is not going to meet those criteria. This is why, when it comes to spaghetti, I just buy a jar of sauce and add things that I like to it. 

Tonight, I used a jar of Great Value Traditional Sauce.  It's the same sauce I use when I make my lasagna.  It's delicious and has chunks of tomato in it.  I browned my pound of ground beef and added chopped onions. I drained the fat and added the sauce, garlic salt, red pepper flakes, oregano, nutmeg, tomato paste and Worcestershire sauce.  I topped the plate with freshly grated Parmesan cheese. 

The best thing about dishes like this is that you can whatever you like.  It's much like a salad in that way.  You leave out the things you don't want and throw in all your favorites.  I especially love that Walmart now carries the tomato paste in a tube.  It's double-concentrate and very reasonable. I haven't posted a recipe tonight, because I don't use one.  I hope you find your inner chef and discover a sauce you love.  Enjoy!

Thursday, July 15, 2010

Chicken Parmigiana

This dish actually came as a request from a friend.  Several months ago, Zac was about to have his tonsils taken out.  I told him that I would like to cook a meal for him before he had it done (and thus couldn't eat solid foods for a little while).  He wanted this.  I looked over several recipes and finally found this one.  I can't remember where I got it, because I when was looking, I never thought I would be posting it on a blog one day. 

This dish is outrageously simple. I would definitely say that anyone can prepare it.  I would like to mention the bread crumbs that I use for my dishes.  When I was at the beach back in May, my friend Danny (who is an amazing cook!) had this huge jug of bread crumbs.  He told me that he bought it at Costco (I love Costco). These bread crumbs are Vigo Italian Style Bread Crumbs with imported Romano Cheese.  They really have a lot of flavor.  If you have a Costco membership and have thought about using them, go for it.  I use them in this dish, meatloaf, meatballs, hamburgers, onion rings, etc.  It's a 5 lb. package, but they go quicker than you would think.

Chicken Parmigiana
1 egg, beaten
2 ounces dry bread crumbs (just eyeball it)
2 skinless, boneless chicken breasts
¾ (16 ounce) jar spaghetti sauce
2 ounces shredded mozzarella cheese
¼ cup grated Parmesan cheese

Preheat oven to 350ºF (175ºC). Lightly grease a medium baking sheet.

Pour egg into a small shallow bowl. Place bread crumbs in a separate shallow bowl. Dip chicken into egg, then into the bread crumbs. Place coated chicken on the prepared baking sheet and bake in the preheated oven for 40 minutes, or until no longer pink and juices run clear.

Pour ½ of the spaghetti sauce into a 7 x 11 inch baking dish. Place chicken over sauce, and cover with remaining sauce. Sprinkle mozzarella and Parmesan cheeses on top and return to the preheated oven for 20 minutes.

Normally, I serve the chicken without pasta.  I would serve a side dish of some sort.  I decided to try something a little different tonight.  It was a good change, but I like it alone as well.  If you want to serve with a vegetable, I would leave off the pasta.  Also, you would think that after baking the chicken for a full 60 minutes, that it might get tough.  It's definitely not tough.  The result is a very moist and tender chicken breast that is full of flavor and very delicious. Enjoy!

Tuesday, July 13, 2010

Two Pizzas and Strawberry Lemonade

For some strange reason, I've been wanting to try a new pizza recipe for quite a while.  I had a craving for Feta and spinach.  After a good deal of searching, I found a great Greek Pizza online. It sounded great (much like a Greek salad I've had before).  After making this pizza, I must say that it really is quite good.  I wouldn't say it's one of my favorites, but if you like Greek style food, you'll enjoy this pizza.  Unfortunately, I forgot the rosemary.  I'm sure it would have only added to the already flavorful pizza, but I'll have to wait until next time to know for sure. Recipe from Fields of Greens by Annie Somerville.

Greek Pizza
1 Tbs. extra virgin olive oil
½ medium-size red onion, thinly sliced
Salt and pepper
2 garlic cloves, finely chopped
1 lg bunch spinach, washed, 8 to 10 cups
1 tsp. minced lemon zest
Pizza Dough, ready to roll out
Garlic Oil
6 Kalamata olives, pitted and chopped
3 ounces feta, crumbled, 1 ½ cups
¼ lb. mozzarella, grated, 1 ½ cups
½ oz. Parmesan cheese, grated, 3 Tbs.
1 tsp. chopped fresh rosemary

Heat 2 tsp. of the olive oil in a sauté pan. Add the red onion, ¼ tsp. salt, and a few pinches of pepper. Sauté over medium heat for 4 to 5 minutes, until tender. Add half of the garlic and sauté for 1 minute. Transfer to a bowl.

Heat the remaining tsp. of olive oil in the pan. Wilt the spinach over high heat with ¼ tsp. salt, a few pinches of pepper, and the remaining garlic. When the spinach is wilted but still bright green, in about 1 minute, remove it from the pan and place it in a strainer to cool. Squeeze out the excess moisture with your hands, then coarsely chop and toss with the lemon zest.

Preheat oven to 450°F. Roll out the dough and place it on a lightly oiled pizza pan or well-floured wooden peel; brush with the Garlic Oil. Spread the onion on the dough, followed by the spinach. Sprinkle the olives over the spinach, follow with the crumbled feta, then add the mozzarella cheese.

Bake the pizza, in the pan or on a preheated pizza stone, for 8 to 12 minutes, until the crust is golden and crisp. Remove it from the oven and sprinkle with the Parmesan cheese and fresh rosemary.


The other pizza is an old favorite of mine. I  sort of made this recipe myself based on the Barbecue Chicken pizza from Village Tavern in Winston-Salem, NC. I've ordered this pizza so many times, that I could easily remember the toppings on my own.  I'm sure that you'll enjoy this pizza.  As I've stated in previous posts, I use Sweet Baby Ray's Hickory and Brown Sugar BBQ Sauce.  It's the absolute best (everybody says so).  This time, I did not use the Pillsbury Pizza Crust (usually I do).  I decided to try the pizza crusts that are hanging up unrefrigerated.  If you get them at Walmart as I did, I think it's near the pastas. They were delicious and baked up a little crispier than the Pillsbury.

Barbecue Chicken Pizza
1 Pillsbury Pizza Dough
½ cup spaghetti sauce
2 boneless skinless chicken breasts
1 ½ cups Italian Blend of Cheeses
Barbecue Sauce
5 – 7 slices of bacon
Cilantro

Preheat Oven to 425º or whatever your pizza recipe says. Spread pizza dough onto large cookie sheet with nonstick mat. Prebake the pizza crust for 5 minutes. Spread spaghetti sauce onto crust. Cook chicken breasts and bacon. Cut chicken into small cubes and add to pizza. Spread cheese blend (Italian blend: Provolone, Mozzarella, Parmesan and Romano) onto pizza evenly. Sparingly spread the BBQ sauce over the pizza. You don’t need to use a lot. Using kitchen shears cut the bacon into bits and spread evenly on pizza. Also using kitchen shears cut cilantro and add some to pizza (Don’t go overboard with fresh cilantro, a little goes a long way).


One the way home today from work, I heard a commercial on the radio that mentioned sweet strawberry lemonade.  It sounded so delicious and refreshing that I knew I need to make some when I got home.  I had purchased a lemon to use for the Greek Pizza so I thought I could slice it right up and add it to the lemonade.  I had leftover strawberries from the cobbler and another dessert that someone else made for a friend's birthday.  What better way is there to celebrate Summer?  I keep lemon juice on hand for various recipes (and just recently purchased more from Costco), so I knew that making this delicious and quenching beverage would be no problem. 

I hope you enjoy all the recipes I have given you so far.  Please feel free to comment and try them.  If you need any assistance or have questions, feel free to send me a message. Enjoy!!


Monday, July 12, 2010

Mozzarella Meatloaf Muffins

This is one of the only recipes that I can actually claim as my own.  Several years ago, my friend Stephanie went to Let's Dish and made something similar to these Mozzarella Meatloaf Muffins.  That's where I first got the idea, but I couldn't find a recipe anywhere. I googled and searched and nothing.  Finally, I decided that it couldn't be all that difficult and I could just come up with one on my own.  After all, it was really just a meatloaf with cheese in the middle.

Since I first start cooking this recipe, I have made a few changes. I usually add some of the BBQ sauce into the meat mixture.  If you have never tried Sweet Baby Ray's BBQ Sauce, then it is a must for this recipe.  I prefer the Hickory and Brown Sugar flavor. Most recently, I have found this at Walmart for $2.00.  Food lion has the same bottle for nearly $3.50ish. At Costco, you can find a package of two bottles for about $4.98.  Walmart clearly has the best price for Sweet Baby Ray's BBQ sauce.

Mozzarella Meatloaf Muffins
1 small onion (or ½ large onion)
½ green bell pepper
1 to 1 ½ lb. lean ground beef
1 cup bread crumbs
1 egg
2 tsp. Worcestershire sauce (opt.)
¼ cup milk
1 Tbs. garlic powder
salt & pepper (to taste)
Mozzarella String Cheese (6 sticks)
Hickory & Brown Sugar BBQ Sauce (Sweet Baby Ray’s)

Preheat Oven to 350º. Finely chop onion and green pepper (or put into food processor). Put ingredients into mixer bowl. Add beef, bread crumbs, egg, milk, garlic powder, Worcestershire sauce, 2 tbs. BBQ sauce, salt and pepper. Blend ingredients in mixer at a low speed (You can use your hands in a bowl, but this is a lot less messy).

Cut cheese into 2 pieces. Shape meatloaf into balls. Place into greased muffin pan. Using your finger, make a hole in the center and insert 1/2 stick of string cheese. Bake for 27 minutes (or until brown). Serve with barbecue sauce. Yield: 9 - 12

I also made green beans again tonight, but I did not retry the dill recipe.  I just made these the way I normally do.  I used bacon grease, onion, garlic salt and pepper.  They were delicious. Everyone that has made these tells me that they're delicious (and they would be correct). If you decide to use your mixer to combine the ingredients, make sure that you put all the ingredients in the bowl first and then use the mixer for a very brief amount of time.  You don't want to make mush.  You can also use your hands, you'll be using them to form the balls anyhow. Enjoy!

Sunday, July 11, 2010

Strawberry Cobbler

This recipe is one of my all-time favorites.  It's a dessert that can be whipped up in a matter of minutes.  When we went to the beach back in may, I mixed up all the dry ingredients and put them in a Ziploc baggie. It was like having my own boxed mix.  When it was time to make it the cobbler, I just dumped the mix into a bowl and added a cup of milk.  The easiest type of cobbler is probably peach.  It's so easy to buy a large can of sliced peaches in heavy syrup.  It's the perfect amount and the peaches are already sweetened.

The strawberries I used for tonight's cobbler were bought fresh from Costco.  I cut them and macerated them by adding sugar. You could do the same with fresh peaches or blueberries.  I've never tried any other fruit beyond that.  I also always add some of the juice to the top of the cobbler to sweeten it even more.

This is a very common recipe and is very close to a recipe that was mentioned in the movie, Steel Magnolias.  Steel Magnolias is a long-time favorite of mine. In the movie (during one of the salon scenes), they talk about the recipe called, Cuppa Cuppa Cuppa. 

Truvy:  "It's a cuppa flour, a cuppa sugar, a cuppa fruit cocktail with the juice, mix and bake 'til gold and bubbly."

Clairee:  "Sounds awfully rich."

Truvy:  "It is, so I serve it with ice cream to cut the sweetness."

 
I haven't tried Truvy's recipe, but my friend Megan tried it once and said that it wasn't all that good. I would say that my mom's cobbler recipe is the best I've ever had.
 
Fruit Cobbler
1 stick margarine or butter
1 cup flour
1 cup sugar
3 teaspoons baking powder
1 cup milk (I use skim and it also works)
1 qt. fruit (with some sweetened juice)

Heat oven to 375 degrees. Melt 1 stick margarine in 9 x 13 baking dish in heated oven (make sure you do not allow your butter to brown). Mix together all ingredients except fruit and add to heated dish. Add approx 1 quart fruit on top of bread mixture (with some of the sweetened juices). Cook about 25 minutes (or until gold and bubbly).

I used a 10 x 15 dish tonight so I increased the recipe. I used 1 1/2 cups of flour, sugar and milk and 4 1/2 tsp. of baking powder. Try this one, you'll love it.  Enjoy!!

Honey-Rosemary Chicken with Dilly Green Beans

The chicken dish that I prepared tonight is one of my all-time favorites.  I fix it all the time, because it is very simple and can be prepared quickly.  I got the Honey-Rosemary Chicken from Rachael Ray.  She prepared it on her talk-show and I immediately knew that I had to make this.  The glaze that goes along with this dish is also tasty with rice, beans or whatever side dish you may be preparing. 

When you are cooking your chicken, make sure that you don't try to move it around until it's ready to be flipped.  Five to six minutes should be enough time.  If you have followed the directions and used the proper amount of oil, the chicken should be beautiful and golden.  I know the recipe says 4 -6 chicken breasts.  I only ever use the number I actually need.  It makes no difference how many you use. I have never used pine nuts (mainly because I couldn't find any), but I once used cashew pieces.

This is my second attempt at making these green beans. I don't think that I will be trying them a third time.  The first time, I did not follow the recipe exactly and I wasn't thrilled at how they turned out.  This time, I followed the recipe exactly and was, yet again, less than impressed.  The first time, I used canned beans and this time I used fresh home-grown beans.  I don't like green beans that aren't soft and cooking beans for 3 -5 minutes just isn't long enough.  I feel like if you cooked the beans like normal and then drained them and prepared them with this recipe, it might be better.  I have plenty of beans and I may give it a try if I can. I will leave the recipe if you decide you want to try it and have better luck that I have...let me know.

Honey-Rosemary Chicken
(Rachael Ray)
2 tablespoons Extra Virgin Olive Oil, divided
Salt and black pepper
4 6-ounce pieces boneless, skinless chicken breast
1 large shallot, finely chopped
2 cloves garlic, finely chopped
3 sprigs rosemary, finely chopped
½ cup honey
1 rounded Tbs. Dijon mustard
Juice of 1 lemon
A handful of pine nuts or sliced almonds, toasted (optional)

Heat 1 tablespoon EVOO, a turn of the pan, in a large skillet over medium-high heat. Season chicken with salt and pepper. When oil smokes, add chicken to the pan and cook 6 minutes on each side. Remove from pan and cover with foil.

Reduce heat under pan to medium and add another tablespoon EVOO, a turn of the pan. Add shallots, garlic and rosemary to pan and cook 2-3 minutes. Add honey, stir in Dijon and lemon juice. Add chicken back to the pan and coat on all sides with the bubbling glaze. Turn off heat.


Dilly Green Beans
½ cup chopped onion
1 tsp. butter
1 teaspoon canola oil
1 ½ cups frozen cut green beans, thawed
3 Tbs. dill pickle juice
1 tsp. sugar
1 tsp. dill weed

In a small skillet, sauté the onion in butter and oil until tender. Add green beans; cook for 2-3 minutes or until heated through. Stir in the pickle juice, sugar and dill; toss to coat.


Saturday, July 10, 2010

The Basic Lasagna

I have a great recipe for a very basic lasagna and it came right off the pasta box.  Sometimes you don't have to try really hard to find something worth while.  Lasagna is a very simple dish that can be prepared ahead of time.  In the past, I have prepared the lasagna the night before and refrigerated it.  The following evening (when I'm expecting guests), it's nothing to pull out the dish and pop it in the oven.  The best part is, your kitchen is clean!!  I love it.  I also made a lasagna back in May to take to the beach with friends.  I thought it would be easy to travel down and pop in the oven when we arrive.  Voila! Homemade meal at the beach.  There were several easily remedied problems.  I will share them with you so you won't repeat my mistakes.  That's what this blog is here for,  after all.

Do not freeze your lasagna.  I thought that traveling in a car for 4 1/2 hours would be plenty of time for a lasagna to thaw.  That would be grossly incorrect.  I baked the lasagna for over an hour and still had to put the pieces in the microwave.  In the future, I will put the lasagna in the fridge and just keep it chilled while traveling. 

Do not overcook your lasagna.  I haven't actually done this myself, but I've tasted it.  You don't want your pasta to be mush.  When you are cooking your pasta, keep the time just under the suggested cooking time on the box (usually 10 minutes).  The pasta will finish cooking later in the oven.  If you cook it to completion in the water, it will be overcooked later.

Lasagna al Forno
16 pieces (1 lb.) lasagna uncooked
1 lb. ground beef
4 cups spaghetti sauce (32 oz.)
4 cups (32 oz.) ricotta cheese
2+ cups shredded mozzarella cheese
3+ Tbs. grated Parmesan

Heat oven to 375º. Cook pasta according to package directions. Meanwhile, in medium saucepan, cook meat until brown; drain. Stir in spaghetti sauce; simmer 5 minutes. In 13 x 9 inch baking dish, spread ½ cup meat sauce. Place 4 pasta pieces lengthwise over sauce, overlapping edges. Spread 1/3 ricotta and mozzarella cheese over pasta; cover with ¼ sauce. Repeat layers TWICE, beginning and ending with pasta. Spread remaining sauce on top; sprinkle with Parmesan cheese. Cover with foil; bake 30 minutes or until hot and bubbly. Remove foil; bake 5 minutes. Let stand 5 minutes before serving. Makes 8 to 10 servings.
 
I use more than the requested amounts of mozzarella and Parmesan cheeses.  I keep a block of Parmesan on hand and just shred it directly onto the lasagna using my microplane grater.  If you don't have one, I suggest you look into it (us.microplane.com). The actual recipe also calls for 26 oz. of spaghetti sauce.  This is NOT enough in my opinion.  I usually use 1 1/2 of the 26 oz. jars from Walmart.  I really love the Great Value sauce and it's extremely reasonable.  I get the traditional flavor.  I keep it on hand for any dish because it's very simple to 'doctor up' for whatever occasion.  The reason I love this recipe is because it is very easy to add ingredients and make it your own.  As is my rule,  however, try it the original way first (unless you've already made a lasagna or two). Enjoy!

Friday, July 9, 2010

Patriotic Cupcakes

I absolutely love cupcakes.  After buying a book entitled, Hello Cupcake, over a year ago, I have made dozens and dozens of cupcakes. My most recent version was inspired by July 4th and Patriotic day at the Pharmacy.  I purchased the red cupcake liners at Sur la Table in Greensboro (http://www.surlatable.com/). It's a wonderful store and if I had more money, I would frequent it more often.

In the book, Hello Cupcake, the reader is given hints and tips.  My favorite tip is how to make a boxed cake mix taste more like homemade.  When you buy a box of cake mix (in my case, French Vanilla), the directions on the back include adding the following ingredients:  1 1/3 cup water, 1/3 cup oil and 3 eggs.  In the book, they tell you to ignore these directions and add 1 cup buttermilk, 1/3 cup oil (or whatever amount of oil the directions say) and four eggs.  Darker cakes usually require more oil.  Other than these changes, follow the directions exactly.

I love to make my own frosting. I detest canned frosting, because it's usually too sweet.  I really prefer Costco cakes and frosting, but I have no need for a giant tub of frosting, so I stick to making my own.  It's actually super easy as long as you have Percy (or any electric mixer).  I've also used my GE hand held electric mixer (pre Percy days).  I got my frosting recipe from Wilton's website (http://www.wilton.com/).  There you will find many options for other frostings.  I have also tried the chocolate version and I must say, it tastes just like a Wendy's Frosty (just not as cold).  It's very delicious.

Wilton's Buttercream Icing
½ cup solid vegetable shortening (it's easiest if you buy it in the sticks)
½ cup (1 stick) butter softened (soft, NOT melted)
1 tsp. clear vanilla extract
4 cups sifted confectioners' sugar (approximately 1 lb.)
2 Tbs. milk

(Medium Consistency)
In large bowl, cream shortening and butter with mixer. Add vanilla. Gradually add sugar, 1 cup at a time. Beat well on medium speed. When all sugar has been mixed in, icing will appear dry. Add milk and beat at medium speed until light and fluffy. Keep bowl covered with a damp cloth until ready to use.

For best results, keep icing bowl in refrigerator when not in use. Refrigerated in an airtight container, this icing can be stored 2 weeks. Re-whip before using. For thin (spreading) consistency icing, add 2 tablespoons light corn syrup, water or milk.

For Pure White Icing (stiff consistency), omit butter; substitute an additional 1/2 cup shortening for butter and add 1/2 teaspoon No-Color Butter Flavor. Add up to 4 tablespoons light corn syrup, water or milk to thin for icing cakes.  (I've never tried this version)

For my cupcakes, I colored my icing blue.  I will only say this once, so pay close attention:  NEVER COLOR YOUR FROSTING WITH LIQUID FOOD COLORING!!!  Coloring paste is very inexpensive and you can find it in jars or tubes.  It will help maintain the wonderful texture of your frosting.  It's so readily available that you can get this at pretty much any grocery store or craft store.  I've seen inexpensive boxes of multiple colors.

Thursday, July 8, 2010

Outback's Alice Spring's Chicken

If you've ever been to Outback, I'm sure you're aware of a dish called Alice Spring's Chicken.  This dish is chicken smeared with honey mustard, blanketed in bacon and smothered with delicious cheese.  I can think of a better way to battle that low cholesterol level.  The original dish calls for mushrooms, but as I do with everything, I leave the mushrooms off.  No mush for me.

Outback's Alice Springs Chicken
4 chicken breasts, ½" thick
honey mustard
6 slices bacon, sliced in half
½ tsp. McCormick's Season All
1 cup sliced mushrooms, drained (opt.)
3 cups shredded Colby or Monterrey jack cheese

Rub chicken breast with Seasonal All and set aside to marinate for 1 hour.

Preheat oven to 350º. While the breast is marinating fry bacon crisp and drain. Sauté chicken breasts on medium heat in pan with just enough oil to prevent sticking. Cook on both sides until a slight golden color and cooked in the middle but not dry. Remove from pan and place in a 9 x 13 dish. Spread chicken breast with honey mustard, cover with a layer of mushrooms, three pieces of bacon and then sprinkle with shredded Colby/Jack cheese, chicken should be covered with shredded cheese. Bake about 15 minutes or until cheese melts. Sprinkle with parsley and extra honey mustard may be served on the side.

Tired of your bacon getting too curly?  Rachael Ray says that if you start your bacon in a cold pan and allow the heat to rise gradually, it won't curl nearly as much.  I have tried this and it occasionally works, but not 100%.  I will say for those who don't cook bacon a lot, I'm sorry.  I would also like to say, don't make the mistake of cooking it too hot.  Like many dishes, you don't need as much heat as one might think to cook them done.  I usually cook my bacon on 4 (on a heat scale of 1 - 10). Give it a shot, see what you think.  Addition (7/10/10): Don't cook your bacon until it's really dark.  It will become darker when you take it off heat.  If you want your bacon to be crispier, then allow it to get slightly dark OR remove it from the heat and then put it back in the pan. If you are like me and you also like the bacon just before it gets crispy.  I just feel like it has more flavor when it isn't really crispy.
 
A great tip for cooking chicken in a skillet.  Once you've placed your chicken in the skillet, don't move it until it releases itself from the pan.  In this recipe, I first cook the bacon, then drain the pan of the drippings, but I do not wipe it clean.  This helps flavor the chicken and also helps to keep it from sticking.  If you look at the pan in the picture with the chicken, it looks awfully dirty, but it will clean up beautifully if you de-glaze the pan with water while it's still hot.  I also sometimes soak it with detergent to help release the remaining bits.
 
I hope you try this dish, It's truly delicious.  A few other changes I make.  I use Colby Jack Cheese.  I buy it by the block at Walmart (or even Costco) and let Percy shred it with the slicer/shredder attachment.  The first time I tried this recipe, the honey mustard seemed more tangy than sweet so the next time (and every time since) I've always mixed the honey mustard with actual honey.  When you're purchasing your honey mustard, take a look at the sugar content.  If you buy the one with less sugar, you'll probably want to also get honey.  I like this tangier honey mustard to use on sandwiches and I would rather mix it with honey than buy the sweeter mustard.  If you have the honey mustard that is used to dip chicken nuggets in, then it will probably be fine by itself.  I hope you enjoy!